Linux is Best Operating System

Linux is good operating system as compare to windows because it is open source and secure.

Ubuntu is also Good

Ubuntu operating system is used on client machines mostly to access servers remotly or other works

Linux Most secure Operationg system

Friends Its true Linux is a secure because in this all data store in files not in .exe or .dll everything is possible to edit.

Linux is little diffecult to Use

Linux is little diffecult to use but if you use it daily then you love it as we love it .

We love and respect the Indian Army

Indain Soldires are die for our freedom I love and respect Indian Army

Showing posts with label CentOS. Show all posts

Monday, 6 January 2014

How to Configure Squid proxy Server

Hello... Friends , Today we are going to discus about the Squid proxy server, If we Discus why the Squid proxy then let's see about it's features as :

  1. we can restrict to access any specific web sites
  2. we can restrict to access specific keywords 
  3. we can restrict any ipaddress to access our web site
  4. we can allow full access to specific ipaddress 
  5. we can restrict downloading size 
  6. we can configure squid proxy as a transparent proxy 
So we can say we can use squid proxy server for caching and filtering web content. various organisations and internet providers are using it to reduce the bandwidth and increase the response time.
Squid proxy service will cache the requested web-content and re-using it for the further request of the same web contents.

Squid proxy
configuration file : /etc/squid/squid.conf
Default port : 3128


Installation of squid proxy server 

Step 1 : install the squid proxy with yum server as 
# yum install squid


after installation start the squid proxy server as 
# service squid start
# chkconfig squid on

Basically the configuration file for squid proxy server is as /etc/squid/squid.conf . if we are using squid proxy without any change in it will work proper with squid caching feature too.

Step 2 : Now we need to setup our web browser to access internet through proxy server on port 3128.
we are using firefox so the proxy configuration for squid proxy will be as :
go to options /Preferences >> Advanced >> Network >> Settings >>Choose manual proxy configuration >>type your proxy server ip and port no.

by default the squid proxy server is working on port 3128 but we need to change it to 8080  & give the ipaddress as well & check to all. :')
Now open any website like here i am opening www.google.com & now check the log files                      # cat /var/log/squid/access.log 
in the image given bellow the request to the google.com is coming from proxy web server as we set my proxy server ip is 192.1168.56.103.


if we check it more clearly how a proxy server work check the image below 

in this image we can see the request done to the ISP is filtered by proxy server & after that this response to collected from the proxy server too.

Note : if you are not be able to send request using proxy server then disable your iptables & SELINUX from enforcing to disable as

# service iptables stop
# chkconfig iptables off
&
# SELINUX= enforcing to SELINUX= disable 

Now reboot your server :")

Now Let's Configure Squid proxy server as web filter :

as i tell you we can restrict any website in network or we can restrict any particular ipaddress using squid proxy server 

1. How to restrict any website 
we can block any particular website in our network like google.com , facebook.com etc. 
just open the conf file & edit it (vim /etc/squid/squid.conf ) as shown


try to open the restricted urls in your browser


2. How to restrict to access specific keywords 
these all if we want to restrict few sites if we have a long list then how to block them :')
just create a file in the /etc/squid directory example vim /etc/squid/restrictsites & add it in acl list 
as :
acl restrictsites url_regex -i "/etc/squid/restrictsites"
http_access deny restrictsites


 let's try with browser can we access these words or not


3. How to restrict ip address :
this is same as blocking urls for ip address blocking we just need to add acl as 

acl restricted_client src ip_address

for complete network add as 

acl restricted_client_network src ip_address/gateway


Wednesday, 1 January 2014

How to Install & Configure mod_security With OWASP on Apache Server

Hello... Friends, Today we are going to discus about the mod_security in the web application. mod_security is basically an open source web application firewall (WAF) and intrusion detection and prevention system for web applications.This web app. mod_security is basically used to protect and monitor real time HTTP traffic and web application from brute force attacks and it also work as IDS?IPS ( Intrusion Detection and Prevention System ) Here we are going to configure this mod security with OWASP.

mod_security is not only installed in Linux it also works on windows based server too. But we here going to work on Linux based server.

Let's Start ...

Step 1 : before going to install mod security we need to install some dependency package install them before it
# yum install gcc make


# yum install libxml2 libxml2-devel httpd-devel pcre-devel curl-devel


Step 2 : now we need to download the tarball of Mod Security package. Download the package from the official site of mod security we can also use yum package too here i am going with tarball method as shown in the images but by using yum server we can install it too as..

 # yum install mod_security 

here Download the tarball in usr/scr directory
as # wget http://www.modsecurity.org/tarball/2.7.4/modsecurity-apache_2.7.4.tar.gz


Step 3: now untar the package as tar xzf package name here my package is modsecurity-apache_2.7.4.tar.gz
now we can see the directory will create in the usr/src directory go to the directory and follows the next interactions ....


 Step 4: now we need to install  the mod security as given command
# ./configure
# make install
it will take a little time please wait for done


Step 5 : Next we need to add core rule sets so that it can block malicious requests to the web server so here we have owasp rules sets
so now download and use the owasp-modesecurity-core rules set in etc/httpd directory

# wget http://pkgs.fedoraproject.org/repo/pkgs/mod_security_crs/owasp-modesecurity-crs-2.2.8.tar.gz/fdee278c02d41a1377dc20a616b2f327/owasp-modesecurity-crs-2.2.8.tar.gz


next extract this using tar command as

# tar -xzf owasp-modsecurity-crs-2.2.8.tar.gz

change the name of exracted directory of core rules in simply modsecurity-crs-2.2.8 as

# mv owasp-modsecurity-crs-2.2.8.tar.gz  modsecurity-crs-2.2.8.tar.gz

#cd  modsecurity-crs-2.2.8.tar.gz

now next we need to rename the conf file name modeseurity_crs_10_setup.conf.example to modesecurity_crs_10_setup.conf

# modesecurity_crs_10_setup.conf.example modesecurity_crs_10_setup.conf

next we need to include these core rules in the apache conf file (/etc/httpd/conf/httpd.conf)

#vi /etc/httpd/conf/httpd.conf

add the location of core rules set into config file (modesecurity_crs_10_setup.conf)as well as conf files in base_rule directory under core rule set directory too

<IfModule security2_module>
      include modesecurity-crs-2.2.8/modesecurity_crs_10_setup.conf
      include modesecurity-crs-2.2.8/base_rules/*.conf
</IfModule>


save the configuration file & Next restart the Apache service as

# service httpd restart

done next we need to test it with vulnerable service is it working properly or not so do it yourself :')

Sunday, 29 December 2013

How to Install LAMP Server and phpmyadmin in CentOs

Hello... Friends, Today I am going to Disuse about LAMP ( LINUX Apache Mysql Php ) Server Configuration. Basically we use LAMP Server to Run website in LINUX. means to say :

OS : Linux ( Here i am using CentOS )
Web server : Apache
Database     : MySql
platform      : PHP

So Let's Start

Here I am going to divide the tutorial into parts as :

Part 1 : Apache installation 

Step 1 : install the apache as

# yum install httpd 


httpd is Apache package .
Now start the httpd service
  # service httpd start
now we need to set the service auto start so that it will start automatically when we restart the system for that run command
  # chkconfig httpd on
Step 2 : verify our service is running or not for that open your browser & open system ip address. In my case my ip address is 192.168.56.101 so i need to open http://192.168.56.101


kk Now we can see our apache service is running properly
Apache default document root is /var/www/html
the Apache Default Configuration file is /etc/httpd/conf/httpd.conf  for additional secure httpd configuration read article as Secure Apache Configuration

Now we complete our First part of LAMP Configuration.

Part 2 : MySql Database Installation

Step 1 : Install the MySql as # yum install mysql mysql-server 


Now Start the service as # /etc/init.d/mysqld start else we also use command # service mysqld start
now we need to set service auto start  # chkconfig mysqld on

Step 2 : Next we need to install secure mysql
# mysql_secure_installation 


next we need to create password for remote user , remove test user , remove extra privileges etc.


follow the configuration as shown in images


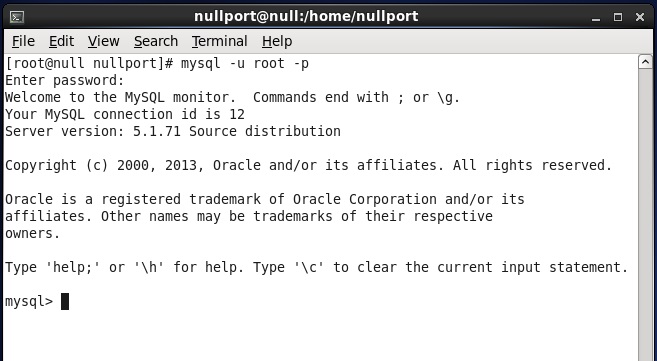
well now we need to test we install it correctly or not as


Well we install mysql correctly.

Part 3 : php Installation 

step 1 : Install the php as # yum install php


now restart Apache
 # service httpd restart
so here we install php too
Step 2 : now we need to test the php installed successfully or not now as we know the root directory for web server is /var/www/html we need to create a test file in the same directory so # vi /var/www/html/info.php

& type as

<?php
phpinfo ();
?>

Step 3 : now we need to open this file in the browser as http://192.168.56.101/info.php
**Note : remove this file after testing this file contains all information of you system server


Part 4: phpMyAdmin Installation 
phpMyAdmin is a web interface through which you can manage your MySql database.
To Do so we we need to enable the RPMforge repositry on our CentOS system as as phpMyAdmin is not available in the official CentOS 6.4 repositry :

Step 1: Download & enable RPMforge repositry 

Now Import the RPMforge GPG key:

# rpm --import http://dag.wieers.com/rpm/packages/RPM-GPG-KEY.dag.txt

ok now if you are working on x86  64 system:

# yum install http://pkgs.repoforge.org/rpmforge-release/rpmforge-release-0.5.2-2.e16.rf.i686.rpm

if you are working on i386 system:
yum install http://pkgs.repoforge.org/rpmforge-release/rpmforge-release-0.5.2-2.e16.rf.i686.rpm

Step 2: now install phpmyadmin

# yum install phpmyadmin


well now configure phpmyadmin
phpmyadmin configuration file is also in the /etc/httpd/conf.d/phpmyadmin.conf  now open this with editor as # vi /etc/httpd/conf.d/phpmyadmin.conf 
Comment the Directory as shown :


Step 3 : Next we change the authentication in phpMyAdmin from cookie to http
open file as # vi /usr/share/phpmyadmin/config.inc.php


Step 4 : now restart the apache service again
# service httpd restart

now open phpmyadmin in browser as :

http://192.168.56.101/phpmyadmin 
well give root username & password & njoy


Wednesday, 18 December 2013

How to Configure Samba Server

Hello... Friends today we are going to discus about Samba server , Samba is an open source implementation of SMB file sharing protocol that provides file and print service to SMB/CIFS clients. Samba  allows a non-windows server to communicate with the same networking protocol as the windows products.


Step 1 : First of all Install samba package as # yum install samba-* -y 


Now configure samba server so that we can configure it for auto start

# chkconfig smb on
# chkconfig nmb on

if we discus about these services Demon
smbd : this service provides printer sharing services
nmbd : this service provides NetBIOS-to-IP-address name service
NetBIOS over TCP/IP requires some method for mapping NetBIOS computer named to the IP address of a TCP/IP network.

Step 2 : change SELinux configuration from enforcing to disable

# vi /etc/selinux/selinux

now save it

Step 3 : open the port in iptables rule :

Basically Samba server use these port :

137
138
139
445
here we are using only port 137,138,139 so add these ports in iptables as shown


save iptables rules & Restart the iptables service

# service iptables save
# service iptables restart

Step 4 : Next add a user to use this service i am here using user "nullsmba" who use  this service


# useradd nullsmba 
# smbpasswd -a nullsmb

make a directory with name share

# mkdir /share
# chown -R 0755 /share

Step 5: Next backup conf files & edit the config file

# cp /etc/samba/smb.conf  /etc/samba/smb.conf.bak
# vi /etc/samba/smb.conf


Now add share portion for smb in the config file

   [share]
      path = /share
      public = no
     writable = yes
     printable = no
     browseable = yes
     valid user = nullsmb
     hosts allow = 192.168.56.0/24

save the file & start the smb & nmb services

# service smb start
# service nmb start

Step 6 : Next let's test the service is running ok or not

# testparm


yeah it Runs properly now let's connect remotely in the network share this service

Step 7 : Let's connect shared folder Remotely 

for window xp :

just go to start >right click on my network place >map network Drive > assign letter then click on finish button > Give username & password


here is the drive shared by Samba server

here i am adding these two files so that we can test that we are able to share files remotely using samba server

here is both files in our server machine too

for Linux : 

just in terminal type smbclient //server-ip/shared-folder -U username


Tuesday, 17 December 2013

How to Configure basic IPTABLES | Concept of iptables | Basic firewall Restrictions

Hello.... Friends, Today i am going to discus  about the iptables in Centos/RedHat 6. In this post we Discus how to open & close a particular port in CentOS /RedHat . How ro create a simple firewall. How  to restrict port based attacks. like Dos/DDos attack. In this post we learn how to configure a basic iptables a basic firewall.

we are here study about basic iptables filter Rules for more details see manual of iptables here

How to open necessary ports : 

As we know we use servers publicly like web server , mail server, if necessary VPS using SSH. so these all services runs on particular ports like SSH running on port 22, web services running on port 80 & 443 (SSL port ). for sending email we use SMTP & Secure SMTP which are running on the port no. 25 & 465 respectively. to let user receive  emails from others we use POP3 & Secure POP3 which are using port 110 & 995 respectively. so these are all the services we are using so we need to open these ports only rest we need to close


In the beginning the server will comes with empty configuration means to say all the traffic is allowed. to restrict the traffic & configure  again just flush the rules or we can say erase all rules by just running a simple command

Flush iptables :

# iptables -F 

First we open localhost :

# iptables -A INPUT -i lo -j ACCEPT

In above rule we told the firewall add (-A) a rule to incoming (INPUT) filter table that comes to localhost interface ( -i lo ) and accept ( -j ACCEPT ) it. so think no need to tell about localhost or loopback , it provides us facility to work us in our local network means communicate machine locally

Next open web server services : 

# iptables -A INPUT -p tcp -m --dport 80 -j ACCEPT
# iptables -A INPUT -p tcp -m --dport 443 -j ACCEPT

here we add port 80 & 443 ( http 80 & https 443 ) to accept chain traffic on these ports

Next sending mail open SMTP server services :

# iptables -A INPUT -p tcp -m tcp --dport 25 -j ACCEPT
# iptables -A INPUT -p tcp -m tcp --dport 465 -j ACCEPT 

here we add port 25 & 465 ( smtp 25 & secure smtp 465 ), i recommend to use secure ports for services first because it's more easier to have password sniffed from 25 than from 465. so here we protect out clients from password sniffing attacks. while sending mails from our server

Next for receiving mail open POP3 server service :

# iptables -A INPUT -p tcp -m tcp --dport 110 -j ACCEPT
# iptables -A INPUT -p tcp -m tcp --dport 995 -j ACCEPT

here we add port 110 & 995 ( POP3 110 & secure POP3 995 ) , again we need to use secure POP3 first for service for receive mails.

Next we need limiting access for SSH : 

# iptables -A INPUT -p tcp -m tcp --dport 22 -j ACCEPT

we know about SSH, SSH is basically use for remotely connect the VPS , VPS is working on port 22 by default, to secure the SSH i recommend you to change the SSH service on different port than 22 & open that port in iptables

Note : if you are using permanent IP address then we could only allow SSH from the source & allow the firewall to open connection from that IP address else it would not work because it is main address not LAN address. & open connection as

# iptables -A INPUT -p tcp -s PERMANENT_IP_ADDRESS -m tcp --dport 22 -j ACCEPT 

PERMANENT_IP_ADDRESS = IP ADDRESS ( 117.56.118.53 )

Next open connection for ping & package updates :

# iptables -I INPUT -m state --state ESTABLISHD,RELATED -j ACCEPT

here we allow to use other outgoing connections like ping & software updates from out firewall

Next we only open connection for outgoing connections & close all other connections :

# iptables -P OUTPUT ACCEPT
# iptables -P INPUT DROP


Block most common attacks : 


As we restrict from DDos attack we need to put off the usual network scanning bots so that attacker can't find our server to attack . I know we can't fully secure from DDos by just simple using iptables but we restrict unnecessary packets

So First we start with Null packets blocking :

# iptables -A INPUT -p tcp --tcp-flags ALL NONE -j DROP

by using above command we told the firewall that take all the incomming packets with tcp flags NONE and just DROP them :') 
If we talk a little about Null packets means to say recon packets, In this attack pattern attack see how we configure the server & find the weaknesses.

Next we block the Syn-flood Attack : 

# iptables -A INPUT -p tcp ! --syn -m state --state NEW -j DROP

Syn-flood attack means attackers open a new connection, but do not state what they want. they just want to take up our servers' resources. so we need to reject such packets.

Next block the XMAS packets :

# iptables -A INPUT -p tcp --tcp-flags ALL ALL -j DROP

Christmas tree packets tells attackers about every single option set for whatever protocol is in use these packets are like as null packets.

Save iptables & start service again :


now we done our almost all work next we need to save the iptables configurations before saving conform as

# iptables -L -n 


this command tells us about all the list we assign to iptables means list ( -L ) only according to ipaddress ( -n ) not domains names assigned to ip address

save iptabes & restart service :

# iptables-save | sudo tee /etc/sysconfig/iptables 
# service iptables restart


here in directory where the ip address file is /etc/sysconfig/iptables  you can open it with vi editor or other editors too
# vi /etc/sysconfig/iptables 

so njoy the Day :')

Sunday, 8 December 2013

Secure Apache Configuration | Retraction of Various Web Attacks

Secure Apache Server installation


Apache web server installation using yum ( Yellow dog Update Modifier )

Apache is a freeware & opensource Web Server which is mostly used for the web server approx 70 % web servers are Apache web server .Apache web server is basically used to launch the web pages or the web sites.

we need to install latest Apache server with latest patches

some Important Info for Apache


  • Service  : V-managed Service
  • package : httpd, httpd-devel,httpd-manual
  • Demon   : /usr/sbin/httpd
  • script      : /etc/init.d/httpd
  • port used: 80 & 443 (http & https )
  • conf. file  : /etc/httpd/conf/httpd.conf
  • Default selinux deamon : /var/www
step 1 : Login as root user & then type yum install httpd-* -y
#su
password:
#yum install httpd-* -y


Now yum install the Apache server

#service httpd start  ( this is used to start the Apache service )
#service httpd stop   ( this is used to stop the Apache service )
#service httpd restart ( this is used to restart or refress the Apache service )
#chkconfig httpd on    ( this is used to continue running of Apache services Automatically after restarting the machine )

now we need to config the Apache server

Step 2 : now we need to open the conf file of Apache too config the Apache server

from here our security part begins 

Remove the default config  files 

#rm -f /etc/httpd/conf.d/welcome.conf
#rm -f /var/www/error/noindex.html

Hide the Apache version number and other sensitive info 

How we can hide Apache version & sensitive directory ?
Now we need to edit httpd.conf file

we need to add server signature off & server token prod
 find ServerSignature if it is on then off it or mark as comments using before the line ServerSignature
& now find the ServerToken it is off by default you may Prod it or use it as comments same as for ServerSignature.

Apache is must be running under it's own user account and group

use it as apache find these lines
user nobody
group nobody

both must be as 
user apache
group apache 

Conform the file outside the web root are not served 

it means we Don't want that the files from outside the web root not be run remotely 
Now how to do that ?

so for web server directory conf like

<Directory />
     Order Deny,Allow
     Deny from all
     Options None
     AllowOverride None
</Directory>
we set Options None and AllowOverride None this will turn off all options and override for the servers you now add that explicitly  for each dir that have the Options or Override .

Directory traversing turning off

how to turn off Dirctory traverse browsing  ?

this is same done by the Options  inside the Directory tag we have to set it as Options to either None or       -Includes
Options -Includes  

& same if you are not using CGI execution then turn it off with same Directory tag Options  set it either None or -ExecCGI

Options -ExecCGI

Next closing symbolic Links , How to do that ??

we knows the symbolic links are also vary important in web server . this can be done by using the same method in the Directory tag set Option None else  -FollowSymLinks 

Options -FollowSymlinks

Now Lets Combine them all to close the all Options 

either we can use :

Options None 

or else 

Options  -FollowSymlinks -ExecCGI  -Includes  

in Directory tag

Turn off Support for .htaccess files, No need to explain about .htaccess file . 
So how to do that ?

this is all done by Directory tag but with AllowOverride directive. Set it to None 
AllowOverride None 

if you require Overrides ensure that they cannot be downloaded , and /or change the name of .htaccess that start with .ht  name like .htnulloverride etc 

AccessFileName .htnulloverride
<Files ~ "^\.ht">
     Order allow,deny
     Deny from all
     Satisfy All
</Files>

Next we have to Disable unnecessary modules

Apache comes with various modules installed in it which are used by the programmers to run and use to retrieve data from the server always a good programmer need to study them that where a php programmer use there skills to secure the web site by scripts & also how to Destroy the sites just by using these modules .

to study these modules please refers to Module Documents of Apache Server .

Study these Modules & enables & Disables them according to Security .

So how to Disable  these modules ??
In httpd.conf  file there is LoadModule to disable these modules just comments it by using in front of this line

i have some modules which are enables but not needed like 
mod_imap, mod_include, mod_info, mod_userdir, mod_status, mod_cgi, mod_autoindex.

Run mod_security for security ..

mod_security is a very important mod for the security 

if you want to learn in deep with mod_security module then study from here
we can perform various Security axns with mod_security 

few are here
  • Simple Filtering
  • Regular Expression bashed filtering 
  • URL Encoding Validation
  • Auditing
  • And various more 
Run the Apache config & binaries with read access only to the root user 

this is done by permissions as 

chown -R root:root /usr/local/apache
chown -R o-rwx /usr/local/apache

here /usr/local/apache is Apache installation  directory 

Now Let's work for DDos attack 
the DDos Attack is basically on Apache server so i have a que how to prevent DDos or Dos Attack 

in httpd.conf file i have find the resign for Dos Attack that means time to send request to a web server & then Returning back time . means to say if we restrict or limit the time out value just as 50 sec or 60 sec then we can restrict the DDos attack on the Apache server 
so set 
Timeout 50
in httpd.conf the old version having 200 to 300 so they are easily DDosed or Dosed by the Attacker 

and we need to Limiting large Requests 

there is one option of LimitRequestBody in httpd.conf to limiting the DDos & if you are allowing file uploads of not longer than 1MB we need to set this setting like this 

LimitRequestBody 1048638

& if you are not allowing file uploading then you can set this value more smaller

Limiting IP Address Access 

if i want to go in a particular IP Regions so  how we can do that ?
wow i want to assign that my website can be access only by IP range from 117.86.0.0/24

so how we can do that ?

we just Allow from 117.86.0.0/24

Order Deny,Allow
Deny from all
Allow from 117.86.0.0/24

by default it is Allow from all in Directory tags


"Thnx for Reading to Protect Indian Cyber Space "  i will try to find more staff like that  

"Respect The Tri-Color"

How to configure Secure FTP server in Linux Centos

Hello friends today we are going to discuss with you how to install ftp server in your Linux , so as we know ftp server is used to transfer files

So here is ftp service profiles

Type:System V-managed service 
Package:vsftpd 
Daemon:/usr/sbin/vsftpd
Script:/etc/init.d/vsftpd
Ports:21(ftp),20(ftp-data)
Configuration files:/etc/vsftpd/vsftpd.conf,/etc/vsftpd/ftpusers,/etc/pam.d/vsftpd
Log:/var/log/xferlog
Related:tcp_wrappers,ip_conntrack_ftp,ip_nat_ftp
default selinux daemon= /var/ftp

& here we are going to discus how to use ftp account by anyone who don't have account on Linux i.e remote user & as well by local users how have account 
so Let's start configurations 

step 1: we need to login as root user in your Linux machine & then type following commands yum install vsftpd-* -y 

Step 2: Now follows these commands 

# service vsftpd start    ( To Start vsftpd service    )
# chkconfig vsftpd on   ( To Auto start after reboot )
# service vsftpd restart ( To Restart vsftpd service )


Step 3 : Now we need to configure the vsftpd.conf  file

open vsftpd.conf with editor you want vi , gedit , nano etc. as you are using & edit it

:') > If we want to Restrict anonymous user login : 

to do so just anonymous_enable=YES ( Replace YES with NO flag )
save & restart service again
# service vsftpd restart 

:') > If we want to restrict Local user login :
to do so just uncomment  # local_enable=YES ( remove # )
save & restart service

:') > If you want to restrict local user to change root :

as we knows a local user can use root dir "/" so here is our security effects , if you are not restricting local users to access root dir then it will become a security breach & anyone can access all dir in the root dir. So how to config this  # chroot_list_enable=YES ( remove # ) &  # chroot_list_file=/etc/vsftpd/chroot_list ( remove # ) save & quit

Now edit chroot_list file

# vi /etc/vsftpd/chroot_list
type username
save & quite
# service vsftpd restart

:') > If you want a single users login :

to restrict a single user to login we need to edit ftpusers file as
# vi /etc/vsftpd/ftpusers
type username
save & quit

now it ask password and deny login

or we can edit user_list  too as
# vi /etc/vsftpd/user_list
type username
save & exit

now it deny access without asking

Step 4 : Now we need to set upload permissions for anonymous user :

mkdir -p /var/www/null_ftp
chgrp ftp /var/www/null_ftp
chmod g+w /var/www/null_ftp
chcon -Rt public_content_t /var/www/null_ftp
chcon -t public_content_rw_t /var/www/null_ftp

now we need to edit vsftpd.conf file
#anon_upload_enable=YES ( remove # )
save & quit

Step 5: If you want to give permission for anonymous user to creat directories:
Simple we need to edit vsftpd.conf file
#anon_mkdir_enable=YES( remove # )

Step 6 : If you want show any banner page :
now again we need to edit vsftpd.conf 
#ftpd_banner=welcome to blah ftp service ( Remove # & type your matter you want to show ) 
save & quit

ok now we can use our ftp server

Client commandline connection :
Now as we want to connect on other end in Client machine so what to do this
we just need to type ftp <ip address> 

when you are using as local user then give your username & password else if you want to login as anonymous user you just simply need to connect simply without password


thnx & njoy Configuration 

How to Configure SSH Secure Shell Server in Linux | Remote Login Utility

Hello Friends, Next we are going to discuss about SSH we can say secure shell server , Basically it a Remote login utility which is used to connect Remotely with other system. This utility works as Telnet but the key difference is it has security features & has data encryption scheme.

Type:System V-managed service 
Package: openssh-server ( for server ) & openssh-clients ( for Client )
Daemon:/usr/sbin/vsftpd
Script:/etc/init.d/vsftpd
Ports:22
Configuration files:/etc/ssh/sshd_config,/etc/ssh/ssh_config,
Log:/var/log/xferlog
Related:tcp_wrappers,ip_conntrack_ftp,ip_nat_ftp
default selinux daemon= /var/ftp

Step 1: we need to login as root privilages & then to install sshd server type yum install openssh-server 


Step 2: now we need to install Client for sshd server so type yum install openssh-client


Now after installation start service by service sshd start


here is our sshd dir in /etc/ssh


customize sshd.config & ssh.config file accordingly if we want to run ssh on other port then we just need to change Port 22 to other on which we want to run ssh & uncomment it ( remove # ). now we need to login to our ssh server by ssh username@server_ip_address with default port 22. else if you are using user defined port then ssh -p port_no username@server_ip_address 

:') > Now let's understand RSA ( Rivest-Shamir-Adleman ) key authentication for ssh access : here we comes with security while remote connection, RSA provide us secure data transmission over internet for more info about RSA google it. so we want to setup RSA key for any user for example if i want to setup for user "nullport" & when we try to login as nullport user then it simply loged in without password basically here we generates two files in /home/user/.ssh folder where one is public key file (id_rsa.pub) & other is identification file ( id_rsa )


Here is our public key & Identification file ..


ok now play with config file 
Our ssh config file is here  # /etc/ssh/sshd_config 
we need to change the ssh port no. from sshd_config file just we need to uncomment it & replace ssh port no (by default 22) we can define what ever we need, Let's we config it at port no. 2222, we can define the ListenAddress of our machine so that we can only access in a particular network by default it is 0.0.0.0 i.e we can access it from anywhere & from any network. 
we have by default PermitRootLogin yes we have to No or by default this option is like #PermitRootLogin yes Remove # & set it to NO  it & we need to define our own root user by adding a single Line AllowUsers nullport now only user nullport have root access to our system we need to save the config file & restart the service by command service sshd restart  now we don't have login permissions with root users too as we try to login as root user with ssh root@192.168.56.101 & when we apply the password then we get nothing it give us a message access denied & when we try with our user nullport we define it in config file then we can logged it the machine remotely by ssh nullport@192.168.56.101 then we can logged in. as we know only the root user can change everything in our machine but remotely we can't logged in as root privileges.  

One more thing i want to discuss with you if we define our own port no then we need to define it while logged in remotely as ssh nullport@192.168.56.101 -p 2222 suppose here we define our port no 2222 in our config file. 

here we can use putty from windows , 
*** we just avoid hackers to root the server :') not fully but if he is not much expert then we can avoid him "Hackers are the Power"
so this is our short tutorial on ssh Remote login utility ....